Raisin Tea Biscuits with a hint of Orange

Today, like most others, I sat down with a pot of tea, opened my shiny silver laptop, and immersed myself into literary deliciousness. I usually start with my favorites, and when my finger gently clicks the mouse to close the last page, I start looking for more. Ones that will catch my eye and draw me in. Ones that immediately draw my attention, whether it be the style of writing that makes me feel as though I'm there, in the kitchen, or mouth watering recipes that I add to my list, or the beautifully orchestrated pictures that inspire me to get out my camera and start taking pictures. I am inspired by colorful creations, I will drool over chocolate, cheese, and butter, and almost always laugh along, knowing that I'm not the only person who will over beat a meringue, drop my lemon tart on the ground, and come home to a furry beast eating a dozen doughnuts that took me the whole afternoon to make.


This morning was extra special, because I was able to sit down with my pot of tea and enjoy a warm, sweet, buttery tea biscuit topped with creamy butter, and a dollop of strawberry rhubarb jam, while reading my morning favorites. I was quickly reminded of that summer I spent frolicking amongst the lakes and the fells that make up most of northern England, where I fell in love with scones, jam, and cream.

[Disclaimer - to the best of my knowledge, scones and tea biscuits are the same thing. I use these two words interchangeably.]


RAISIN TEA BISCUITS WITH A HINT OF ORANGE RECIPE
makes 15 large

Ingredients
4 cups all purpose flour
1/4 cup white granulated sugar
1 tbsp salt
2 tsp baking soda
4 tsp cream of tartar
1 cup raisins
zest from one orange
1/2 cup unsalted butter, cubed, chilled
1 3/4 cup 1% buttermilk
2 tbsp milk for brushing

Directions

1. Preheat the oven to 400 F.

2. In a small bowl, place the raisins with enough boiling water to cover. Let sit for 5 minutes then discard the water. Set to the side.

3. Cut the butter into tiny cubes and place in the freezer for 10 minutes.

4. In a large bowl, mix the flour, sugar, salt, baking soda, and cream of tartar.

5. Add the raisins and orange zest and combine.

6. With a pastry cutter or your hands, work the butter into the flour until the butter is the size of tiny peas, no smaller. Stir in the buttermilk until all the ingredients are wet. Do not handle the dough too much.

7. Place the dough onto a floured counter and roll out an inch thick. With a glass or cookie cutter, cut out the biscuit shapes and place onto a cookie sheet. Line the biscuits so that they are all touching.

8. Brush the tops with milk and bake for 15 minutes. Remove form the oven and let cool for 10 minutes. Serve with butter, jam, and cream.


Cheesy Grits Recipe and a Brief History

Lets talk about grits: a creamy, savory, hearty and totally American dish. Before moving to Seattle, preparing grits took up a small to non-existent part of my cooking repertoire. I first sampled this intriguing dish with a local gathering of friends over a Sunday brunch. I was amazed at its creamy texture and heartiness, resembling a more traditional dish in my parts of the world: cream of wheat, which I do not care for in the least. I particularly enjoy the savory, rich, and luxurious aspects of grits, which I feel is lacking in it's cousin. Some would even go say that if your grits resemble the consistency of cream of wheat, then you haven't made them right.

First off, and before we go any further, we must get a few things straight. Before I embarked upon this adventure, I was extremely confused. Polenta, grits, hominy, cornmeal - it was all such a blur. I have simplified things below, and now we can all get our cards in order.

Grits is a creamy dish, similar to oatmeal or cream of wheat, made with one part corn grits or one part hominy grits and four parts liquid. Based on my research, it appears as though people are also using the term 'grits' to describe the actual grain itself. Grits, the dish, is common the the Southern parts of the US, Georgia and Mississippi.

Hominy refers to corn from which the bran and germ have been removed by soaking in a lye bath. This process is called Nixtamalization and was a truly fascinating discovery by the Meso-Americans. By treating the corn with lye solution, a strong alkali traditionally in the form of wood ash or lime, the corn's bound niacin becomes converted to free niacin, you can prevent Pellagra, a disease caused by niacin deficiency.

Polenta is the Italian word for grits. Polenta is made with cornmeal and broth, while grits use a larger grain (corn grits) and water. Some people refer to polenta as cornmeal mush.

Cornmeal has a slightly coarser grind than corn flour and is finer than corn grits. It is made from ground yellow corn, and is commonly used in cornbread and pancakes.

Corn Flour is a powdery flour made from corn meal. In Australia and Britain, the word corn flour is used synonymously with cornstarch. Corn flour is typically combined with others flours and used in gluten-free baking.

Masa Harina is flour that has been made from ground hominy corn, and is used to make corn tortillas, common in Mexico.

My quest to make the perfect grits has been historically derailed by many failed attempts to find this rare grain in my parts of the world. This time, I finally cracked and resorted to using cornmeal.  The insatiable desire for cheesy grits had to be fed. The resulting texture from using cornmeal was quite different from that of traditional grits, and left something to be desired. It was much thicker, and quickly formed into the shape of the pot. I tried my best to get it thin, but to no avail; I was left with a consistency resembling scrambled eggs. As soon as I make my way back home, I am putting hominy grits at the top of my grocery list. Despite the obvious lack of corn grits, this dish was a hit. My family adored the rich flavors of the cheese and cream, and marveled at the colors. It was creamy, rich, and satisfying. Grits will now become part of my culinary repertoire and I am excited about the journey I am about to embark on, in the world of corn.


CHEESY GRITS WITH SHRIMP AND GRILLED VEGETABLE RECIPE 
serves 4
recipe adapted from Alton Brown

Ingredients
1 cup milk
1/2 cup cream
2 1/2 cups water
1 cup coarse corn grits, cornmeal can be substituted
3 tbsp butter
1 cup aged cheddar, shredded
salt and pepper to taste
2 tbsp butter
2 cloves garlic, minced
1 sweet onion, sliced
1 red pepper, sliced
1 cup crimini mushrooms
20 - 25 jumbo shrimp or prawns
1/4 cup white wine
1 tsp chili powder
1/4 cup cream

Directions

1. In a large pot, bring the milk, cream, and water to a boil. Once boiling, reduce the heat to low. Slowly add the cornmeal and stir. Continue to stir with a wooden spoon, the whole time, and cook until all of the water has been absorbed. If your grits become too thick you can add some boiling water to thin them out.

2. Once the grits have reached the desired consistency, remove from the heat and add the butter and cheese and stir. Season with salt and pepper.

3. In a large frying pan, fry the garlic and onion with butter on medium heat for 5 minutes. Add the red pepper and continue to cook for another 5 minutes.

4. Add the mushrooms and fry until tender. If you are using raw shrimp, cook until they have turned pink. If you are cooking frozen shrimp, fry until thawed and warm to touch. If you are using precooked thawed shrimp, cook for only one minute.

5. Turn the heat to medium-high. Push the shrimp and vegetables to one side of the pan. Add the white wine and chili powder to the opposite side of the pan, and stir. Once the wine starts to boil, add the cream and combine. Spread the shrimp and vegetables evenly over the pan allowing the sauce to mix throughout. Continue to cook for 5 - 8 minutes.

6. Scoop some grits into a bowl and top with the shrimp mixture and sauce.

Pumpkin Pie Pudding with Whipped Cream

Friday once again. I am really not prepared for Saturday. I feel exhausted and drained, like someone is sucking all my energy out through my finger tips and toes. My body is trying as hard as it can to fight off baby J's cold. It has done pretty good so far, considering that baby sneezes and drools everywhere. This morning I was bouncing him up and down, and then he threw up all over my face - twice.

I've got a serious question for you - are you a pie filling or crust person, or do you prefer the whole package? If someone offered you a bowl of pie filling sans crust, would you be in pie filling heaven?
If so, this recipe will totally be up your alley. I adore silky smooth pie filling, with a melty scoop of ice cream plopped on top, a slice of aged cheddar on the side, a swirl of whipped cream, and a nice flavorful slightly crispy yet slightly flaky crust. I prefer the whole package. Oh, I am totally in love with pie.

This pudding is a mixture of pumpkin, spices, cream, and eggs baked into tiny dishes. They are cute, fun, and easy to make. I love that you can fancify them with a dollop of whipped cream and a sprinkle of cinnamon. I haven't dabbled much in the pudding department, but I'm now super excited. This pumpkin pudding recipe has opened up so many new possibilities. Dark chocolate, caramel, salted caramel. Truth be told, I love most desserts that are served in tiny bowls with tiny spoons to be delicately scooped into my not so tiny mouth. There's yogurt, ice cream, and creme brulee - oh my gosh, now I'm hungry.


PUMPKIN PIE PUDDING WITH WHIPPED CREAM RECIPE
makes 6 half cups
recipe adapted from Smitten Kitchen

Pudding Ingredients
1 3/4 cups pumpkin puree (not pumpkin pie filling)
1/2 cup white granulated sugar
1 tsp cinnamon
1/2 tsp salt
1/2 tsp ground ginger
1/4 tsp ground cloves
1 cup milk (2% or whole)
1/2 cup whipping cream or heavy cream
2 eggs

Whipped Cream Ingredients
1 cup whipping cream
1 tsp vanilla extract
1 tbsp confectioners sugar

Directions

1. Preheat the oven to 350 F.

2. In a small bowl combine the sugar, cinnamon, salt, ginger, and cloves. Add the pumpkin and whisk until combined.

4. Place the pumpkin spice mixture into a saucepan on medium heat. Once it starts boiling, continue to cook for 5 minutes.

5. Whisk in the milk and cream. Remove from the heat and beat in the eggs one at a time.

6. Pour the mixture into 6 small baking dishes. Place on a cookie sheet and bake for 35 - 40 minutes, or until a knife inserted comes out clean.

7. Let sit at room temperature for 1 - 2 hours.

8. To make the whipped cream, beat the whipping cream on low speed for one minute. Increase the speed to medium high and continue to beat until soft peaks start to form. Add the vanilla and sugar and combine. Place a dollop of whipped cream on each pudding followed by a sprinkle of cinnamon.


How to Make a Pie Crust and a Classic Pumpkin Pie Recipe

How to Make a Pie Crust and a Classic Pumpkin Pie Recipe

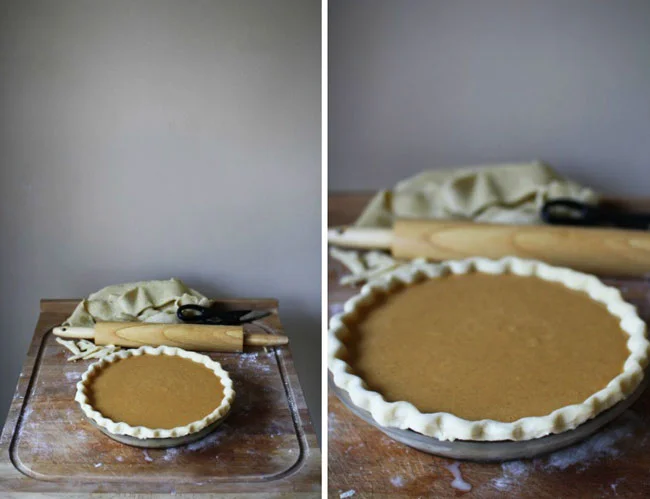
This pumpkin pie recipe is very traditional, pumpkin, eggs, evaporated milk, sugar, and spices. You can't go wrong with this filling recipe. It's moist, creamy, silky, and smooth, and the best part, it's easy to make. For this past year, I have been experimenting with different pie crusts, trying to find the perfect one.

Granny's Raisin Cookies

Whenever I sink my teeth into one of these plump raisin cookies, I remember what it was like being a kid, not being the slight bit interested in calories, saturated fat, taxes, bills, or trying to impress anyone. I remember my grandmother's raisin cookies as being a hit amongst family, it was her signature recipe. She always had a tin stashed away in her pantry for the hungry passerby. If they weren't being gobbled up by older relatives, they were being thieved by a younger greedy paw or two. My grandma especially liked to make them around the holiday season. She was a woman known for her baking. I am now back home visiting little M for the holidays, and she truly loves these cookies, much more than I. I called up my mom to inquire about this recipe. Over the phone, she carefully read me the ingredients,  ensuring not to leave out a single drop. Then, I skillfully attempted to gather the ingredients from my sisters unruly baking cupboard.

To be honest, I'm not sure if my grandma developed this recipe from scratch, or found it in a book, though I can be certain that she didn't get it from allrecipes.com My grandmother grew up in the Mad Men era, she was a classic Betty Draper. She loved flowers, gardening, Royal Doulton figurines, and decorative spoons. I imagine that back in the day she had flashy aprons, dazzling silverware, and sparkling china, and I am most certain that she liked to play cards, eat shortbread, drink ice tea by the pool, and dance the jive.

Its funny how a simple recipe can bring back so many memories. How one cookie can remind you of the past, and of the people you miss. When my grandmother passed away, my family divided up her things amongst the children. They desperately wanted me to take something to remember her by, a Royal Doulton figurine, a piece of jewelry, a Christmas ornament, but I knew that as long as I had my granny's raisin cookie recipe, I would never forget her.


GRANNY'S RAISIN COOKIE RECIPE
makes 4 dozen

Ingredients
1 cup vegetable shortening
2 cups white granulated sugar
3 eggs
1/2 tsp salt
2 cups raisins
5 cups white all-purpose flour
1 tsp cinnamon
1/2 tsp all-spice
1 tsp baking soda
5 tsp baking powder

Directions

1. Preheat oven to 350 F.

2. Soak the raisins in 2 cups of boiling water until plump.

3. Cream the shortening and sugar.

4. Beat in the eggs one at a time, for one minute each.

5. Add the dry ingredients and combine with a wooden spoon.

6. Add in the raisins and stir.

7. Form the dough into round balls and then flatten into disks. Place onto a cookie sheet.

8. Bake for 15 minutes and let cool on a wire rack.

Spaghetti Squash with Avocado and Parmesan Cheese

The late nights, jet lag, and overall lack of sleep has finally begun to catch up with me. I know this to be true, as I am feeling extremely content lounging around the house, sipping tea, and watching the leaves slowly and gracefully fall from their long gnarled branches to the ground.

As I sit on the kitchen chair, gently peering out the window, I am overwhelmed by the quietness that surrounds me. I can hear nothing but the wind blowing, the leaves rustling, and every so often, a squirrel or two. I am amazed by the country tranquility, and have been longing for this peace for some time.

This peace and quiet reminds me of how I used to stew with anger at the 6:30 am garbage trucks dropping dumpsters out my window, the frat-boy nightclub right next door, the crazy man yelling profanity at the top of his lungs, and the yappy little dog down below. For the time being, I don't miss the hustle and the bustle of the city. I don't miss traffic, city lights, and tram tracks. Pretty soon I will long for these annoyances, but for now, I am content.

I am also perfectly content eating warm spaghetti squash with avocado and cheese for breakfast, lunch, and dinner, being that it's such a satisfyingly creamy, earthy, and savory bit of deliciousness.

This dish is healthy and hearty, and a perfect meal to help you transition nicely from fall to winter. It's a perfect dish for those nights you arrive home from a long day at work, and have absentmindedly forgotten what winter feels like when the nights become dark by 4:00 pm. When all you want to do is curl up with a book and a glass of wine and soak in the tub for hours watching Mad Men reruns, and are 5 seconds away from dialing your favorite local Thai food take-out.


This dish is so simple and easy you wont regret turning down that Thai. You simply cut the spaghetti squash in half - most likely be the hardest part of the recipe - and then put it in the oven for 45 minutes to bake. While the squash bakes, you can enjoy a glass of wine or two, take a soak, or call your best friend.

Forty-five minutes later, scoop out the delicate, steamy, spaghetti-like strings, which will be perfectly content tossed in a frying pan with olive oil, garlic, lemon, salt, and pepper. Once all of the flavors have introduced themselves to each other, tangled, and then been absorbed, arrange some squash on your plate, top it with avocado and Parmesan cheese, and enjoy your accomplishments.

[Print Recipe]

SPAGHETTI SQUASH WITH AVOCADO AND PARMESAN CHEESE RECIPE (makes 4 - 5 cups)
{recipe adapted from Melinda at the kitchn}

Ingredients
1 spaghetti squash, halved
3 tbsp olive oil
1 garlic clove
1/2 lemon, squeezed
salt and pepper to taste
1 avocado, chopped
fresh grated Parmesan cheese

Directions

1. Preheat the oven to 375 F.

2. Cut the spaghetti squash lengthwise. Place face down in a baking dish and fill with water 1/4 inch high. Place the pan into the oven and bake for 45 minutes.

3. In a large frying pan, add the oil and minced garlic. Fry for a couple of minutes.

4. Once the squash has cooked, remove it from the pan. With an oven mitt, hold the squash and scoop out the inside strings. Place the squash strings into a frying pan with the oil and garlic. Fry the squash for 10 minutes.

5. Add the lemon juice, salt, and pepper. Stir.

6. Scoop the squash into a serving bowl or plate. Top with chopped avocado and shredded Parmesan cheese. Serve warm.


Pumpkin Seed Pesto

Today I leave you with a lip smacking, mouth watering, taste tantalizing recipe for pumpkin seed pesto. I leave you this recipe before I embark on a journey back to my homeland. I leave you this recipe to tide you over through the weekend. Starting Monday, I will be blogging from a small town near Toronto. I am heading to this small town too spend some well needed time with my sister {little M} and her new baby {baby J}. Unfortunately, Mr. H will be staying in Seattle while I embark upon this journey. He will have to man the post, water the plants, dust the shelves, and pay the bills. I will miss him dearly, but in no time at all, he will also be making the journey back to our homeland. We are quite fortunate that our families live within a 20 mile radius from each other, and we can spend the holidays with both. Pretty soon I will be sharing recipes for Christmas cookies, mulled wine, apple cider, salted caramels, and all that good Christmas stuff. I am planning to make baby J his first gingerbread house, hopefully hear his first word, and see him crawl for the first time. I promise that my blog with not turn into a baby/mommy/craft blog. I have nothing against that genre of blogging, but that is not in my interest nor my intent. Plus, I'm way too cynical for that.

I have a whole stack of homemade, passed down from generation-to-generation recipes to share with you when I get home. Little M has a whole recipe box full of these gems. At first, there shall be a little adjustment. My food props will change, the lighting will be different, I won't have the convenience of living on top of a grocery store. I will need to plan, make lists, write notes. These are all things that I am not very good at, but I will be living with baby J and little M and these sorts of things will be necessary. On my journey, my big fluffy Ody will be accompanying me. He will take his first flight, spending 6 hours in a crate, and I am terrified. I'm hoping he will be ok, as in, not have a panic attack. Although the chances of him having a major freak-out are very unlikely, but the chances of me freaking out are pretty high. Self-sedation with a high dose of Benadryl may be necessary.
Enough about me, my dog, and my fears. Let's talk about pesto! Do you like pesto? I like pesto. I like it on my bread, in my pasta, and on my pizza. I like it even more when it has pumpkin seeds, parsley, sage, and garlic. Toss it all into a food processor and spin it around. You will witness the most fragrant aromatic scent you have ever encountered. It is truly wonderful. Drizzle in some olive oil and these herbs and seeds will magically transform into something even better: a rich, earthy, aromatic, flavorful spread that will pair wonderfully with goat cheese and fresh bread. The smells that your food processor will generate from these very few ingredients will be mind blowing. You will want to eat this pesto on everything, and will struggle to resist the temptation to eat it by the spoonful. It is so quick and easy to make, with very few ingredients. I love when I find recipes like this, and am thrilled to share it with you. I will see you next week. Have a great weekend!

PUMPKIN SEED PESTO RECIPE (print)
makes 1 cup
recipe adapted from Cafe Flora Cookbook
notes: you can purchase pumpkin seeds that have already been toasted, but if not, raw pumpkin seeds will suffice.

INGREDIENTS
1/2 cup green pumpkin seeds, shelled and roasted
10 fresh sage leaves
1/2 cup fresh parsley leaves
2 garlic cloves, chopped
1/4 cup olive oil or more
1/8 tsp salt to taste

If you have purchased raw pumpkin seeds, toast them in a frying pan on medium heat, shaking occasionally, until they start to pop. Remove from the heat and place into a bowl.

Wash and pat dry the sage and parsley. Remove the leaves from their stems. Peel the garlic. Place the sage, parsley, and garlic into the food processor. 

Add the pumpkin seeds to the food processor and puree all of the ingredients until the mixture starts to stick together and become crumbly. 

With the machine still running, slowly add the olive oil and continue to puree until the mixture resembles a paste. You may want to add more or less olive oil depending on your preference. 

Add 1/8 tsp of salt, or more if it suits your liking, and combine.

Spread the pesto onto 1/2 inch slices of baguette and top with soft goat cheese. Pesto can also be used as a marinade, pasta sauce, and dressing for sandwiches. You can store in the fridge for up to two weeks. 


Halloween Cupcakes

Happy Halloween!

If it's at all possible, I think I'm sick of chocolate. I've eaten a cupcake a day for the past 4, indulged in many decadent chocolate treats, and am totally done. My body is now craving juicy peaches, crisp apples, crunchy carrots, fresh greens, whole grains, and legumes. I want salads and warm hearty soups. I need oatmeal and yogurt, lentils and tofu and water. No more wine, beer, spirits, cider, mulled wine. {maybe just until Christmas}.

For the rest of you who haven't over indulged on the chocolate train, and love love love cupcakes, I have a recipe for you. As you may or may not know, Trophy Cupcakes are my absolute favorite. They are moist and airy. Sweet, creamy, mouth watering goodness. They are perfect and wonderful and I love them. Lucky or not so lucky, depending on how you look at the situation, they have a cute little shop just down from my house.

Martha Stewart also loves them and has been kind enough to share a Trophy Cupcake recipe on her website, so that we can all enjoy these amazingly delicious bundles of heaven.


Not only are these cupcakes amazing, they are even more special topped with a tiny little pumpkin. The Texanerin has made a wonderful tutorial on how to make these cute little fondant pumpkins. They are perfectly cute on top of a cupcake or in a patch on top of a cake.

I hope you don't over indulge this evening, as I have. Have a fun and exciting Halloween!

[Print Recipe]

HALLOWEEN CUPCAKE RECIPE (makes 24)
{recipe adapted from Trophy Cupcakes via Martha Stewart}

Cupcake Ingredients
2 1/4 cups plus 2 tbsp sugar
1 3/4 cups all purpose flour
3/4 cups cocoa powder
1 1/2 tsp baking powder
1 1/2 tsp baking soda
1 tsp salt
2 large eggs
1 cup whole milk
1/2 cup vegetable oil
2 tsp vanilla extract
1 cup boiling water

Frosting Ingredients
2 sticks (1 cup) unsalted butter, room temperature
3 cups confectioners sugar
1/2 cup cocoa powder
1 tsp vanilla
1/4 cup whole milk

Tiny Pumpkin Ingredients
fondant
orange, brown, and green food coloring

Directions

1. Preheat the oven to 350 F. Line muffin tin with cupcake liners and set to the side.

2. In a large bowl, sift the sugar, flour, cocoa powder, baking powder, baking soda, and salt. With a hand mixer, on low speed, combine the dry ingredients.

3. In a separate bowl, mix the eggs, milk, vegetable oil, and vanilla. Add the wet ingredients to the dry, and mix on medium speed for 2 minutes.

4. Add the boiling water and stir.

5. Pour the batter into the muffin cups 3/4 full. Bake for 18 - 20 minutes or until a toothpick comes out clean. Let cool in the pan for 10 minutes. Remove from the pan and let cool completely.

6. While the cupcakes are cooling, beat the butter until light and fluffy, approximately 2 minutes on medium speed.

7. Add the sugar and cocoa powder, and mix until combined. Add the vanilla and milk and beat until light and airy, approximately 3 - 4 minutes. Once the cupcakes have cooled, frost them. I used a piping bag with a 1M tip. Please follow this link for instructions.

8. To make the tiny pumpkins, please follow this great tutorial from the Texanerin.

Dark Chocolate Fudge Brownies


It's Halloween weekend, which is way cooler than any other regular weekend. I'm planning to drink swanky wine, dance my pants off, eat a lot of spooky desserts, and I'm going to do this all dressed as a ninja. Mr. H is going as a steam punk pirate. Together we are going as ninja vs pirate. He's got a gun and I've got stealth. I'm not sure who will win... it's going to be close. There's a lot to be excited about. I get to be a ninja for the weekend, my left hip has heeled and I can now get back to rock climbing, my best friend has moved to Seattle. I am going home next week to visit baby Jaxon and my family. Christmas is right around the corner. I have my health. I have love, and I have brownies. Oh so chocolaty chewy brownies. I also have strawberries cut into tiny hearts, and that's pretty darn cute.


You should try cutting strawberries into hearts. It will make you happy - instantly. You should also make brownies, because I'm sure this will also make you happy. Brownies are magical because they are gooey, fudgy, chocolaty, moist, dense, melt in your mouth awesomeness, did I mention chocolaty?


You want to know what else is awesome?

Melting chocolate on top of brownies and then watching it slide around,
this gamethis moviethis scenethis songthis rabbitthis whaleand this luckdragon.

Have a great weekend!


DARK CHOCOLATE FUDGE BROWNIE RECIPE (print)
makes one 9x13"pan
recipe adapted from King Arthur Flour Fudge Brownie Recipe

INGREDIENTS
1 cup (2 sticks) butter, unsalted
2 1/4 cups white granulated sugar
4 large eggs
1 1/4 cups Dutch cocoa powder
1 tsp salt
1 tsp baking powder
1 tsp vanilla extract
1 1/2 cups white unbleached flour
2 cups 60% bittersweet chocolate chips

Preheat the oven to 350 F.

Line a 9x13" baking pan with tin foil. Fold the tin foil over the edges of the pan, so it will be easier to remove the brownies.

In a medium saucepan on low-medium heat, melt the butter and sugar until the sugar has melted and the mixture has become translucent. Continue to stir ensuring the sugar does not burn to the bottom of the pan.

In a large bowl, beat the eggs, cocoa powder, salt, baking powder, and vanilla with a hand mixer. Don't worry if the mixture becomes hard and pasty, this is normal. Add in the butter/sugar mixture and continue to beat for 2 -3 minutes until there are no lumps of cocoa powder and the mixture resembles a soupy liquid.

Add the flour and stir the mixture with a spatula until the flour has combined and there are no more white lumps. Add 1 cup of chocolate chips and stir.

Pour the batter into the baking pan and place in the oven on the middle rack. Bake for 30 minutes. If you prefer your brownies more dense and less gooey, bake for 35 - 40 minutes.

Remove the brownies from the oven and pour the remaining 1 cup of chocolate chips on top of the brownies. Let the chips melt and then spread them around with a knife. Let the brownies cool for 30 minutes and then serve warm with a glass of soy or regular milk.


Salsa Verde with Avocado

Happy Friday!

I'm feeling out of sorts today. My dog woke me in the wee hours of the morning with a terrifying high pitched squeal. As I lay there in bed, trying to fall back asleep, I was again startled by the sounds of glass bottles clanking together against the side of a plastic bin. I switched beds, hoping to escape the thin walls that separate my bedroom from the recycling room. I lay there, in the spare bed, slowly drifting back asleep, when out of nowhere I was woken the thunderous slam of the dumpster hitting the concrete floor.

I put my head under the pillow and pulled it around my ears as tight as I could. I finally fell asleep, likely due to oxygen deprivation. I later awoke with a very unsettling feeling. I scurried around the house, with my eyes half open, trying to organize my thoughts. I contemplated driving to the gym, instead of biking in the rain. After reflecting on the hassles of driving, biking seemed like a much more compelling option. I grabbed my bright blue helmet, jumped on my bike, and braved the rain. The ride was predictably miserable and became even worse when my bike tire suddenly jumped into the tram tracks, and became lodged there like nobody's business. Me and my bike went flying into traffic. Luckily I only suffered minor injuries and my bike is still in one piece. I have some scrapes and bruises and am having some slight difficulties walking. I am now totally afraid of tram tracks, rain, bikes, bikes in rain, and spiders - but on the bright side, we've got salsa!


Tomatillos have a remarkable resemblance to the ground cherry, otherwise known as the cape gooseberry. They are quite sticky when removed them from their outer husks, but an easy warm water wash should do the trick.

Tomatillos can be very inconsistent in flavor, some being bitter while others being mild and sweet. Just remember, the smaller the tomatillo the sweeter. Tomatillos are most often used in Mexican cooking, in salsa. For this salsa, I wanted a creamy texture compared to the traditional salsa verde, so I added an avocado. I also left out the peppers and cilantro, but feel free to add them.

I love the fresh citrus-like flavor the tomatillos bring to the salsa. The avocado makes it smooth and creamy. The garlic and onions give it some kick, and the lime juice pulls it all together. This salsa is so deliciously tasty it could brighten anyones day. Especially if your day involved falling off a bike.

[Print Recipe]

SALSA VERDE WITH AVOCADO RECIPE

Ingredients
15 - 20 small tomatillos, chopped
2 garlic cloves, chopped
small onion, chopped
1 tbsp olive oil
1/2 tsp salt
1 tbsp lime juice
dash cumin
1 avocado, chopped

Directions

1. Wash and chop the tomatillos.

2. In a food processor add the garlic and onions. Pulse until finely chopped.

3. Add the olive oil, salt, lime juice, cumin, and tomatillos. Pulse until the mixture is the consistency of pesto.

4. Add the chopped avocado and pulse until combined. If mixture appears too thick, add some water to thin it out.

5. Serve with warm tortilla chips.


Snikerdoodle Cinnamon Sugar Cookies

Today, time passes quicker than ever. There's been no time for coffee, for bed making, nor laundry.
There's been errands, and dentists, and birthdays. We also can't forget healthy eating, exercising, and walking the dog. In the midst of all this business, it's important to take time for ourselves.

On these particularly hectic days, I like to forget about it all and get lost in my kitchen. I like to take time from my busy day to feel the small grains of flour run through my fingers like warm sand on sunny day. I like to roll bits of sweet dough into tiny balls and gently dip them into cinnamon and sugar. I like to sit back and smell the sweetness in the air. It's days like this that I just want to be in the kitchen.


It's here in my kitchen that I have exploded a bag of flour, dropped a stick of butter, and lost the lid from the cinnamon jar. It's also where I have the created most amazing cookies in town - freshly baked Snikerdoodles. I've been meaning to make these cookies for some time now. It's something that has been filed in the back of my internal recipe catalogue, along with a million others, probably somewhere at the back just behind dolmades.

Yesterday, I was reminded - in a slightly spastic manor - of my need to make these cookies. While eating lunch with Mr.H, my eyes drifted to small curly dog sitting on the ground. This dog reminded me of mine, and how I needed to take him for a walk. And then I wondered how long I had been sitting staring at this dog. As my head slowly turned in the direction of the clock, out of the corner of my eye, there it was - the infamous Snikerdoodle. With a total lack of reservation, I dropped my fork, jumped out of my chair, and nearly knocked over a passerby. I extended my right arm, prepared to slap anyone who got in my way, and grabbed the last one. After only one bite, they had quickly moved from the back of the catalogue to the front row. I spent all night with my laptop flipped open, all my baking books spread around me like a sharp uncomfortable blanket.

Late that night, after extensive research, I decided on a recipe from the White on Rice Couple's blog. Clearly Todd had done his research, and it was apparent that we were looking for the same thing in a cookie. I made only minor changes to his recipe, substituting the butter for lard and freezing the cookie before baking.
These cookies turned out chewy, slightly crisp on the outside, perfectly sweet, and are the height of melt-in-your-mouth perfection. Thanks Todd and small dog, and apologies to Mr. passerby.

[Print Recipe]

SNIKERDOODLE CINNAMON SUGAR COOKIE RECIPE (makes 30 cookies)
{recipe adapted from White on Rice Couple}

Ingredients
3/4 cup granulated sugar
1 cup brown sugar
3/4 cup unsalted butter room temperature
2 large eggs
2 tsp vanilla extract
1/4 tsp kosher salt
2 1/4 cup all purpose flour
2 tsp cream of tartar
1 tsp baking soda
1 tbsp corn starch
1/4 cup whit granulated sugar
1 tbsp cinnamon

Directions

1. In a large bowl cream the butter and sugars with a handmixer, until light and fluffy, approximately 8 minutes.

2. Add the eggs, vanilla, and salt. Mix all the ingredients until combined

3. In a separate bowl, sift the flour, cream of tartar, baking soda, and corn starch.

4. Add the flour mixture to the butter and sugar. Gently combine.

5.  Place the dough in the freezer for one hour.

6. Preheat the oven to 350 F.

7. In a small bowl, mix 1/4 sugar and 1 tbsp cinnamon. Remove the dough from the fridge. Line a baking sheet with parchment paper. Roll the dough into tiny balls the size of a quarter. Roll the dough in the cinnamon sugar ensuring to evenly coat the cookies.  Place each cookies on a baking sheet 2 inches apart. The dough will expand while baking.

8. Bake for 10 - 12 minutes. The cookies should be slightly golden on top when done. Remove the cookies from the baking sheet and let cool on a wire wrack.


Pretty Little S'mores Cake

Dear friend, I figured that if we couldn't go camping this weekend, I would bring the S'mores to you.
As you may or may not know, I love to camp. I like to spend the summer days roaming around the wilderness like a nomad, looking for the perfect camp spot, ideally near a gushing river, fed by an overflowing water fall, running off a towering mountain peak. Are you familiar with the term 'flash-camper'. It's similar to a flash-packer, a backpacker who prefers not to sleep with cockroaches, nor in a 5 star abode. This is me in a nutshell. I like to bring along the finer luxuries, such as my extra-large man-bear therm-a-rest, a cooler full beer, a car full of food, a hammock, some camping chairs, a lantern, etc. You know, the good stuff. Mr. H decided that we should step up our level of hardcore by leaning more towards multi-day treks instead of luxury camping. With his newfound interest in mind, we splurged on some ultra light-weight camping accessories, when in my mind we should have splurged on an RV. This was clearly the next progression.


A couple of weeks ago, Mr. H and I went on our first big trek. We picked a hike in the Northern Cascade range with a breathtaking glacier at the end. This hike was only accessible by car, up a tiny narrow winding gravel road that scaled the edge of the mountain. Just as we begun our initial accent, a giant rock came out of nowhere and pierced the side of our tire. Mr. H pulled over to change our flat, and as soon as he kneeled down, it started rain. I, having a slight hatred of rain, wanted to turn around, but Mr. H was determined to conquer nature.

After he changed the tire and finally convinced me to hike in the rain, we hiked for 4 hours, after which we finally arrived at a beautiful meadow between two mountains. We looked around and were surrounded by wild flowers, waterfalls, and marmots. Without a map, or any real idea of where we were going, we decided to keep trucking in hopes of finding the glacier. Two grueling hours later, up a near-vertical slope, we arrived at the base of the glacier - cold, sore, hungry, and tired. We set up camp, ate some soup, and called it a night.

The next morning, the magnificent sun decided to grace us with her presence. It was sunny long enough to hike up the glacier with clear skies, in running shoes, with no crampons, and a bottle of wine as an ice axe. We made it, and the view from the top was breathtaking.


Now I'd like to take a moment to share with you some of the key lessons learned.

a) There can never be too much chocolate
b) Two pairs of socks is better than one
c) Wine bottles make excellent ice axes
d) Fluffy dogs make excellent heating pads
e) Marmots make terrifying screeches
f) Always carry an axe. It may come in handy when changing a tire

The stars must be aligned, because I've now completed a multi-day trek and didn't die. Scaled a glacier with a wine bottle and then slid down on my butt suffering only minor injuries.  And finally, combined cake and S'mores, although I guess it would've been more awesome to have made a S'mores cake while hiking. So, if you're like myself and suffer from sudden insatiable cravings for all things chocolate, particularly S'mores and cake at the same time, then this recipe is for you.

This cake is ooey and gooey, just like a S'more minus campfire smoke. For this recipe I used a ultra moist chocolate cake, sandwiched together with a toasted marshmallow frosting, all covered with a decadent chocolate frosting, and finished off with graham cracker crumbs. Amazing, am I right?


[Print Recipe]

S'MORES CAKE RECIPE
{cake recipe adapted from Essence of Chocolate by John Scharffenberger}

Cake Ingredients
2 cups white granulated sugar
1 3/4 cups all-purpose flour
3/4 cup, natural unsweetened cocoa powder
1 tsp salt
1 1/2 tsp baking powder
1/2 tsp baking soda
2 large eggs, lightly beaten
1/2 cup canola oil
1 cup whole milk
1 cup boiling water
1 - 2 cups graham cracker crumbs

Chocolate Icing Ingredients
1 1/4 cups white granulated sugar
1 cup heavy cream
5 ounces 99% unsweetened chocolate, finely chopped
1 stick (1/2 cup) butter
1 tsp pure vanilla extract

Marshmallow Icing Ingredients
16 large or 9 extra large marshmallows
1 cup icing sugar
2 sticks of butter, unsalted
1/2 tsp pure vanilla extract

Directions

1. Preheat oven to 350 F. Lightly butter the bottom of 2 9-inch round cake pans. Line the bottom of the pans with parchment paper. Butter the parchment paper and sides of the pans. 

2. In a large bowl, combine the sugar, flour, cocoa powder, salt, baking powder, and baking soda. With a hand mixer, beat in the eggs, oil, and milk on low speed. Increase the speed to medium and mix for two minutes. Reduce the speed to low and add the boiling water. Don't worry, the batter will be soupy.

3. Divide the batter between the 2 pans and bake for 30 - 35 minutes. Once done, remove the pans from the oven and let cool for 5 minutes. Remove the cake from the pans and cool on a wire rack.

4. To make the chocolate icing, combine sugar and cream in a small saucepan and bring to a boil on medium heat. Stir occasionally. Once boiling, reduce the heat and simmer for 5 minutes. Add the chocolate and butter and stir until melted. Remove from heat, pour into a bowl and add vanilla. Cool the frosting until it becomes thick and spreadable. Do not ice the cake until it is completely cooled.

5. To make the marshmallow icing, turn the oven to broil. Line a baking sheet with parchment paper and place the marshmallows on top. Place the baking sheet in the oven and toast the marshmallows for one minute on each side until slightly brown. Remove from the oven and let cool.

6. In a large bowl with a hand mixer, beat the icing sugar and butter on medium speed for one minute. Add the vanilla and beat for another 3 minutes. Add the toasted marshmallows and mix until combined.

7. In between the two layers of cake, spread the marshmallow icing. Cover the whole cake with chocolate icing.  Cover the sides of the cake with graham cracker crumbs and then an additional layer of marshmallow on the top. 


Mi Focaccia es tu Focaccia

Dear Friend, Do you like rosemary, garlic, olive oil, and bread? If you answered 'yes' to all of the above, I might have something in store for you. If you're feeling a little trepedatious about diving into the world of bread making, might I suggest starting off with some focaccia. It's super easy to make, and, excluding the rising time, very quick. The first time I made focaccia, I was a little shocked at the wondrous beauty that I had created. It's a warm salty bread that melts in your mouth. The only issue I find with making focaccia, is that it tastes so good fresh out of the oven, it's hard to stop yourself from eating the whole pan. This is why I suggest inviting over some friends and sharing a bottle of wine or two, preferably a pinot gris. They will be grateful, for reals. Personally, I prefer to eat focaccia with some cheese and olives and a bottle of wine. I use the leftovers to make a sandwich, and sometimes I even serve it with some pasta or soup.


You really only need a few basic ingredients to make focaccia. Yeast, water, sugar, salt, flour, and olive oil, plus whatever toppings you decide. You can top it with garlic, herbs, cheese, tomatoes, mushrooms, nuts, sun dried tomatoes, or olives. This is your opportunity to get crafty and truly amaze yourself. First, grab a large mixing bowl. Mix the yeast, sugar, and water. Watch the yeast foam and bubble like lava in a volcano. This is my favorite part.

Next, add some olive oil, salt, and flour. Mix with a spoon until you can't mix no more.

Turn your dough onto the counter and knead until it becomes smooth and elastic. This will likely be the trickiest part, knowing how much flour to add to the dough.

You want to be able to knead the dough without it sticking all over your fingers and the counter, but you still want the dough to have a slightly sticky elastic feel. Once kneaded, the dough should be soft and almost drippy. When you hold it in the air, it should drip off the sides of your hand. It should not hold its shape.

Place the dough into a well oiled bowl and let it rise for one hour. Once it has doubled in size punch it down to get all the air out, and let it rise again.

Once the dough has risen a second time, transfer it to an oiled baking pan. The dough should be very airy, stringy, sticky, and oily. Press the dough into the corners of the pan and then let rest for 20 minutes for an additional rise. Drizzle the dough with olive oil and top with your favorite toppings. Poke tiny indents into the dough with your fingers and then bake. Once you remove the focaccia from the oven, serve immediately. It will be warm, salty, soft, and delicious. The focaccia will melt in your mouth - a feeling similar to eating cotton candy at the fair.

[Print Recipe]

GARLIC AND ROSEMARY FOCACCIA RECIPE 
makes one 12 x 16" pan
recipe adapted from Rebar Modern Food Cookbook

Ingredients
1 3/4 cups warm water
1 tbsp rapid-rising yeast
1/2 tsp granulated sugar
2 tsp salt
1/4 cup olive oil
4 - 4 1/2 cups all purpose flour
5 cloves garlic, minced
4 tbsp olive oil
coarse salt
3 sprigs of fresh rosemary, chopped

Directions

1. In a large bowl, mix the water, yeast, and sugar. Set it to the side and wait 5 minutes for the yeast to proof. The yeast has been proofed when it foams and bubbles.

2. Add the salt and olive oil to the yeast and stir. 

3. Add the flour, one cup at a time, stirring with a wooden spoon. When you can no longer stir, turn the dough onto the counter and knead in the rest of the flour. Knead the dough until its smooth and elastic, roughly 5 minutes. Continue to sprinkle with more flour if the dough is too sticky to handle.

4. Place the dough in a bowl that has been seasoned with oil. Cover the bowl with a damp cloth and set in a warm place. Let the dough rise and double in size for 1 hour. Once the dough has doubled, punch it down and allow to rise a second time until doubled in size.

5. Preheat the oven to 350 F. 

6. Place the dough onto a well oiled baking sheet. Press the dough out until it covers the whole pan. Let the dough sit for 20 minutes to let rise in the pan.

7. Drizzle the dough with 4 tbsp olive oil until it's completely covered and shiny. Spread the minced garlic evenly over the top surface, and then sprinkle with rosemary and coarse salt. With you fingers, poke tiny holes in the top of the dough, so as the dough appears dimpled.

8. Place the pan in the oven and bake for 20 minutes, rotating the pan half way through. Do not over-bake, the garlic should be light brown in color. Serve warm.

Creamy Potato and Cheese Corn Chowder

Dear Friend, One summer, my friend K convinced me and some friends into manning a corn stand perched at end of her very long and narrow driveway. She was very entrepreneurial and persuasive. That summer, K and her father were experimenting with organic corn. Unfortunately, most became infected with the corn borer {warning: corn borers are creepy. think twice before googling}. These are the challenges you face when trying to grow corn without insecticides. We were able to salvage some of the corn. Not enough to sell to the local grain silo, but enough to sell to passersby.  K lived down the road from a golf course, which provided most of our business. She not only made us sell corn at the end of her driveway, but also made us set up a booth at the end of her uncle's driveway. His house was located on a major highway, and that meant opportunity. This entrepreneurial corn endeavor only lasted one weekend, because we refused to commit more than two days. To pass time, we brought a case of beer and a bottle of bourbon, which we kept hidden behind our make-shift corn stand. Surprisingly, sales increased as the day went on - probably because after a few drinks we got more confident in our corn selling abilities, and decided that interactive dance advertising was the best way to attract customers.


Every time I drive by a corn stand on the side of the road, I think about that summer, the bourbon, the corn, and the fun times at the Walker Farm. This summer has been a good year for corn. I have eaten my fair share; in order of tastiness, that would be white, peaches and cream, and sweet corn.  Earlier this week, my local food box sent me five thousand fruit flies, followed by some more sweet corn. I attempted to boil up a cob or two. I drenched it in butter, and covered it with salt, but when I bit in, it was tough and starchy. Odd considering this season's track record. Fortunately, I know a sure-fire way to make the most of tough corn: cut the kernels from the cob, and make corn chowder! Before we get any further, there are two important thing I need to mention. 1) Cutting the kernels off a cob of corn is extremely messy. Wear goggles. Also, if any of you know any tricks, let to me know, because I am still finding pieces of corn on the ceiling, the top of the fridge, etc. 2) When was the last time you cleaned the top of your fridge? Today, I learned that the top of my fridge is a breeding ground for fruit flies and all things nasty. If you haven't, clean the top of your fridge. It's a must.


Sorry, back to chowder. This corn chowder basically consists of oil, butter, onions, potatoes, corn, cheese, and cream. Rich, creamy, and flavorful, corn chowder is a favorite of mine. I like to add some Tabasco sauce to give it a Southwestern kick, whatever that means. Totally just made up Southwestern kick.  Hmm, did I forget to mention the vegetarian bacon?  If vegetarian bacon creeps you out, use real bacon, no biggie. I'm sure you've heard me rant and rave about Morning Star's vegetarian bacon, because it's basically the best thing since real bacon. It has a great salty, smoky flavor that's a must for this soup. I totally dig it.

Remember: creamy, salty, smoky, savory, cheesy, rich soup = corn chowder.

p.s. don't forget the fridge. 


[Print Recipe]

CREAMY POTATO AND CHEESE CORN CHOWDER RECIPE
makes 8 - 10 servings
recipe adapted from The Barefoot Contessa Cookbook

Ingredients
4 oz. of vegetarian bacon
1/3 cup olive oil
2 large onions, peeled and chopped
2 tbsp butter
1/4 cup flour
1/2 tsp pepper
1/2 tsp turmeric
6 cups veggie stock
3 cups white potatoes, chopped
5 corn cobs, or 2 - 2 1/2 cups frozen corn
1 cup half and half
1/4 tsp Tabasco soup
1/4 lb sharp cheddar cheese, shredded

Directions

1. In a large soup pot, fry the vegetarian bacon on medium heat, with the olive oil until crispy. Approximately 5 - 10 minutes.

2. Remove the vegetarian bacon from the oil and set to the side. Peel and chop the onions, and then add to the oil with the butter. Fry until soft and translucent.

3. Once the onions are soft, add the flour, pepper, turmeric and cook for 3 minutes.

4. Add the vegetable stock and chopped potatoes. Turn the heat up to high and bring to a boil. Cook until the potatoes are soft, approximately 30 minutes.

5. Cut the corn kernels off their cobs and add them to a pot of boiling salted water. Boil for 3 minutes, and then remove kernels from the water with a strainer. Add them to the soup and cook for 5 more minutes with the potatoes.

6. Add the cream, Tabasco sauce, and shredded cheese to the soup. Cook until the cheese has melted.

7. Crumble the vegetarian bacon on top of the soup as a garnish.

Baba Ganoush


Dear Friend, Some people are extremely excited about hot yoga. I was a bit curious as to what the hype was all about. I tried my first class on Monday, and this is what I have to say. If the outside temperature were as hot as my yoga studio, I would most likely cry. Then I would use every last penny I owned and buy myself an air conditioned space suit. I would sit around all day in my space suit, eating Popsicles, ice cream, and drinking coke in tiny glass bottles. I wouldn't be very active - definitely no exercise.


I tried hot yoga and I made baba ganoush - the latter being remarkably easier. I've made many baba ganoush's in my time, but never been quite satisfied with any of the results. That's why I'm so excited to share this with you - it's finally a recipe that I am truly happy with. This time around, I used roasted garlic instead of fresh, which gave it a creamier texture It also minimized the pungent flavors you'd expect from fresh garlic.

I used some gorgeous white eggplant, which are much smaller in appearance than their purple counterparts. I find that they taste much creamier, are less bitter, have fewer seeds, and are more tender. They are very mild and sweet, so perfect for people who don't particularly like the taste of the traditional purple eggplant. I took my white eggplant and charred them under the broiler until blackened, which gave them a fantastic smoky favor. The combination of roasted garlic, smoky eggplant, creamy tahini, bitter lemon, and salt to pull it all together, is magical. Baba ganoush, with its fantastic name, is such a wonderfully flavorful dish. I like to eat it with La Panzanella's crispy Croccantini, a few olives, and a glass of white wine. Perfectly divine.

[Print Recipe]

BABA GANOUSH RECIPE

Ingredients
4 small eggplants
2 garlic bulbs, roasted with olive oil
2 tbsp tahini
1 tsp salt
2 tbsp lemon juice
3 tbsp olive oil

Directions

1. Turn the oven to broil. Wash and place the eggplant on a baking sheet lined with tin foil. Broil the eggplant until blackened, approximately 10 minutes, turning once.

2. Cut off the tops of the garlic, place on a sheet of tin foil, and drizzle with olive oil. Place the garlic on the same baking sheet as the eggplant. Turn the oven to 375 F and bake both garlic and eggplant for 30 minutes. The eggplant should be soft when finished.

3. Remove the garlic and eggplant from the oven and let cool. Once cool, squeeze the garlic into a food processor, followed by the tahini, salt, lemon juice, and 2 tbsp olive oil.

4. Remove the eggplant from its skin, and place in the food processor. Pulse a couple of times until you have a creamy mixture. Place in a container and store in fridge for up to 5 days. Serve with pita chips, cracker, or baguette.

Apple Pie

Dear Friend, Does making the perfect pie crust put you in the 'hardcore' category? A friend once told me that when you have finally made a pie crust worth writing home about, you are technically an all-star. This friend may have been full of themselves, no? When I was growing up, my mom used to make a lot of pies. Apple mostly, but I do remember the occasional pumpkin. As a kid, I remember being in love with that smell of baked apples and cinnamon. I wanted to take that smell and bottle it up so I could smell it forever. Turns out, they now have these things called scented candles, and now that I'm a grown-up, I can make pies whenever I want. I do love apple pie, because it reminds me of autumn, fall fairs, Halloween - and it also tastes amazing. Autumn is my favorite time of year.  I have fond memories of grade school, collecting colorful fallen leaves and making what I thought at the time was magnificent art. I also remember my mom raking up fallen leaves - meanwhile, I would sneakily follow her around ambushing any pile I could find. I would jump and destroy, crossing my fingers there wouldn't be any dog poop waiting inside.


When I was growing up, we had a large crab apple tree. I don't ever remember eating the apples, mostly throwing the rotten ones at my sisters. When I wasn't throwing them, I was collecting them for survival. We had a fort, and it was imperative that we collect the apples in case of an emergency. You know - war, famine, etc. This tree was also the perfect climbing tree.  It had nice, long, thick branches. I think the trunk was actually on my neighbors lawn, while the branches grew towards our house. Good thing it wasn't a money tree, or we could've had some problems. I wanted to share this new pie crust recipe with you. I normally use this pie crust recipe, which calls for butter, but today I didn't seem to have any - very unlike me, I know. Luckily I had 9 sticks of vegetable shortening on hand?!?!..!? To make this pie crust you need some flour, salt, shortening, and ice water. Mix the flour with the salt. Cut in the chilled butter with a pastry cutter until it's nice and crumbly - like the picture below.

Slowly added the ice water and mix with a fork. Add enough water so that the dough starts to stick together - like the picture below. Take the dough out of the bowl and knead it into two balls, one slightly larger than the other. Flatten them into two disks, wrap them with Saran wrap, and place them in the freezer.

While the dough is chilling, cut up some apples. Add some lemon juice, sugar, cinnamon, nutmeg, and salt. Let it sit for 30 minutes. You will now have apples and some apple juice.

Take the apple juice and boil it down with some butter. Add it back to the apples with some cornstarch. Toss them into the pie crust that you have ever so carefully rolled out. Top the apples with the other dough layer and then make it look pretty. Pinch some edges, cut some holes. Let the pie relax in the freezer. Once it's relaxed, bake it up.

Once it's done baking, let it cool for 2 hours, if you can wait that long, and then serve it with some cheddar cheese and vanilla ice cream. And..... don't eat a ginormous slice right before hot yoga.

[Print Recipe]

APPLE PIE RECIPE 
makes one 9"pie
recipe adapted from The Pie and Pastry Bible and The Classic Crisco Pie Crust Recipe

Pie Crust Ingredients
2 cups all-purpose flour
1/4 tsp salt
3/4 cup vegetable shortening, cubed
4 - 8 tbsp ice cold water

Pie Filling Ingredients
6 - 8 apples, peeled, cored, and sliced
1 tbsp lemon juice
1/ 4 cup brown sugar1/4 cup granulated sugar
1 tsp cinnamon
1/4 tsp nutmeg
1/4 tsp salt
2 tbsp unsalted butter
1 tbsp + 1 tsp cornstarch

Directions

1. Chill the vegetable shortening in the freezer for 30 minutes before making the pie.

2. In a large bowl, combine the flour and salt. When the shortening has chilled, cut into cubes, and add it to the flour mixture. With a pastry cutter, cut the shortening into the flour until you have a crumbly mixture with pea size pieces of shortening. 

3. Add 4 tbsp of the ice water and mix with a fork. Continue to add the water, one tablespoon at a time, until the dough starts to stick together. Remove the dough from the bowl and knead it into a ball. Divide the dough into two balls, one ball being smaller than the other. Flatten out the dough into two 1/4" thick discs. Wrap with Saran wrap and place in the freezer for one hour.

4. While the dough is chilling, peel, core, and slice the apples. Place them in a large bowl with lemon juice, brown sugar, white sugar, cinnamon, nutmeg, and salt. Toss the mixture and let sit for 30 minutes to one hour. The apples should produce roughly 1/2 cup of liquid.

5. Place the liquid and butter in a small sauce pan on medium heat. Boil down the liquid until you have 1/3 cup. It should be light brown in color and slightly sticky. Pour the liquid over the apples and combine. Next, add the cornstarch and stir until it has all mixed evenly and no lumps of cornstarch are present.

6. Remove the dough from the freezer and place the large piece between two sheets of parchment paper. Roll out the dough until it is roughly the same diameter as the pie pan. You want the dough to be hanging off the sides. Pace the apples on top and then repeat the same process with the other piece of dough.

7. Place the second rolled dough on top of the apples and pinch both layers of dough together with your fingers. Make 5 slits in the center of the pie so that steam can escape while baking. Place the pie back in the freezer for one hour to let the dough rest. This will allow the dough to become more flaky.

8. Twenty minutes before baking the pie, place a pizza stone on the bottom shelf, and preheat to 425 F. Place a piece of tin foil over the stone to catch any drippings.

9. Place the pie on the stone and bake for one hour. Thirty minutes into baking, place some tin foil around the pie edges to prevent burning the crust. Once the pie is done, let it cool on a wire wrack for 2 - 4 hours. Serve with some good aged cheddar cheese and a scoop of vanilla ice cream.


How to Make the Perfect Risotto

Dear Friend, Once upon a time, I believed risotto to be super swank. The kind of dish that only Italians and the classy folk ate. Once upon a time I didn't cook with butter. True story. To prove me wrong, Mr. H made risotto {with lots of butter}. I was rather shocked when he pulled it off. It's not that I wasn't confident in his kitchen skills. Competent he was. I mean, he was the first person I had met who had single handedly won a puff-pastry throw down. It's merely that I thought one had to be Italian to pull that sort of thing off. Clearly, I was wrong. My second experience with risotto was in Italy. Milan, to be exact. I was sitting across from Mr. H, at a small table fitted with a red checkered table cloth. We were approximately 5 inches away from the neighboring tables, all jammed into a small courtyard like tiny sardines. Very intimate I would say. The candles were blowing, the wine was flowing, my neighbors cigarette smoke had begun to drift up my nostrils, and then, out of the kitchen came a gorgeous shiny plate of creamy asparagus risotto. Good thing, because I was about to lay the smack down on the guy with cigarettes. Nothing like food to distract you from your anger.

This risotto was creamy with lots of body. The texture was subtle and fluid. The grains were tender without being too soft. Each grain was its own entity. From my experience, risotto takes a bit of practice. You need to make it a few times to understand the process, how it all comes together, and what exactly you are looking for in terms of texture, appearance, and flavor. Mr. H's first risotto was ok. My first risotto was ok. Giada De Laurentiis first risotto was probably just ok. But, after you've cooked it a few times, it becomes like second nature. Magical even. There are a whole slew of risotto recipes out there. 100 Great Risottos is a good resource. The internet is also a great resource. The thing is, once you learn how to make a basic risotto, you can spruce it up any way you like. My favorite is vegetables, cheese, and butter.  I am totally in love with butter, but if you're not a fan, or are looking for a lower fat version, you can add a vegetable puree at the end, to give it the same creamy texture. To make risotto, you need to start off with some fresh ingredients. I always say fresh is best, but that's because I am a nerd. For my risotto, I chose asparagus. You can use mushrooms, peas, tomatoes, sausage, chicken, lobster, sweet potatoes. It's up to you. For this recipe you will need to boil/steam the asparagus until slightly soft. Set to the side and save the cooking water.


Chop up the shallots and fry them on medium heat with half of the butter. They should be translucent and shiny.

Add the rice to the shallots and butter, and toast for 2 minutes. Do not pre-rinse the rice. We need all the starch we can get. It's what gives risotto that delicious texture. Once your rice is toasty, add a ladle full of the asparagus water. If your recipe calls for wine or you're just feeling a little saucy, add it now. Continue to stir the rice, and let the water cook into the rice. Add the next ladle full of asparagus water, and continue this process. Once the asparagus water has been all used, start to add the stock. The key to a good risotto is in the stock. After you've been cooking your rice for 10 minutes or so, add the chopped asparagus. Below is a picture of your risotto, 2 minutes after you have added the first ladle of stock. 

At ten minutes, you should be half way through the liquid. The volume of rice should be double in size.

At twenty minutes, your risotto should be al dente. Not too hard, not too soft. Take it off the stove and add the rest of the butter and the cheese. Stir it vigorously until creamy and let sit, covered, for 3 - 5 minutes. The rice will continue to cook. Risotto should be served immediately for maximum awesomeness. With a little bit of time and care, you too can make a totally awesome risotto fit for the classiest of classes.


ASPARAGUS RISOTTO RECIPE
makes 4 servings

Ingredients
10 - 12 asparagus spears
1 cup water
dash salt
6 tbsp butter
2 shallots, diced
1 cup dry Arborio, Carnaroli, or Vialone Nano rice 
3 cups vegetable stock
1 cup Parmigiano Reggiano, grated

Directions

1. Wash the asparagus and snap off the ends. Place the asparagus in a frying pan or wok with one cup of water and a generous dash of salt. Boil/steam for 5 minutes until just tender. Once done, set to the side and save the cooking liquid.  

2. In a large pot or wok, on low heat, saute the diced shallots with 3 tbsp butter until soft and translucent {approximately 5 minutes}. In this step you are making the soffritto, the aromatic flavor base.

3. Add the arborio rice and stir. Toast {tostatura in Italian} the rice with the butter and shallots for 5 minutes, stirring to make sure it does not burn.

4. Add the left over asparagus water, a quarter cup at a time. Cook until the water has been absorbed, and then add the next quarter cup, making sure to stir every minute or so. At this time you can turn the heat to medium and add the chopped asparagus.

5. Once you have used all the asparagus water, continue the same process with the vegetable stock until it is all used up. It should take roughly 20 minutes. Remember to continue stirring.

6. Once the rice has cooked, take it off the heat. Add the butter and the cheese, and stir until creamy. Let it sit covered for 3 - 5 minutes. Risotto should be served immediately.